Daemon Agents allow us to automate tasks like Importing, Extracting, and Exporting. We can set up these agents to run continually on your machine or on a remote desktop where they will continue to run until they are stopped.
Before You Begin
You will need the following:
- The Daemon Agent installed on the machine you want it to run from
- Something for it to do
You will also need the following permissions:
- Login
- Admin – Tools – Daemon Agents
Running the Agent from your computer
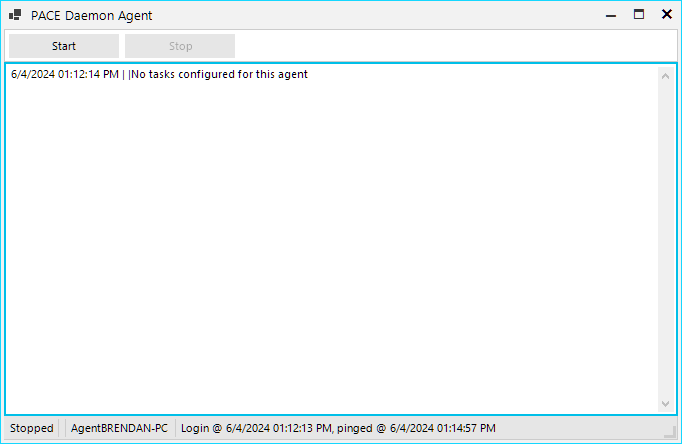
When you first launch your Daemon Agent you will see this screen. Here you can see the Agent Name, Login time, and current status. Right now our Agent is stopped. Take note of the Agent name, as we will need this to configure the agent from within PACE Admin.
Nothing further will need to be done with this window, you can minimize it and just let it run.
Configuring your Daemon Agents
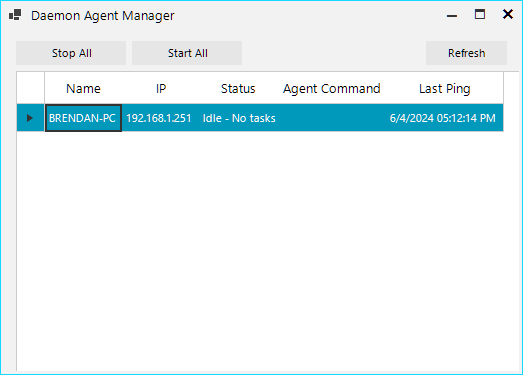
To start managing your Daemon Agents you will need to log into PACE Admin and then select Tools > Daemon Agents. This will open the Daemon Agent Manager where you can configure all of your connected Agents, even ones that are not on the machine you are logged in from.

On this screen you will see a list of all of your connected agents, their current status, the command they are running, and the last time the machine was pinged.
The Name of the agent will be the same as the name of the computer it is running from for easy identification.
The buttons on this screen
Stop All – This button will stop all currently active Daemon Agents, this can be good if you need to run an update or make a change to anything system-wide
Start All – This button will start all currently stopped Daemon Agents, this can be useful if your office were to lose power, or if you have a load of new agents you’ve just set up and want to start them all at once.
Refresh – This refreshes the list of agents, which will update all of the columns to any changed information. The page should automatically refresh every so often, but if you ever need to know right away you can use that button!
Controlling an individual Agent
In order to do anything with a specific Daemon Agent, you will need to right click on the agent you wish to control, and choose one of the options from the menu that appears.
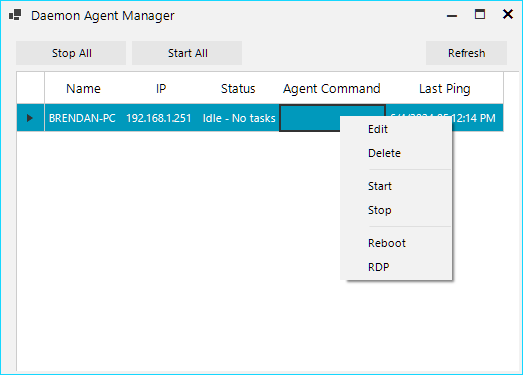
We will cover Edit a little later on in this article, but for now the other options are as follows:
Delete – This will delete the agent from the list. Re-launching the agent while connected to the same Database will re-add it.
Start – This will send a request to start the agent.
Stop – This will send a request to stop the agent.
Reboot – This will send a request to close and re-launch the agent on the machine it is running from.
RDP – Launches the remote desktop connection to the machine a Daemon Agent is running from.
Editing a Daemon Agent
By using the right click menu mentioned above, or by double clicking on the agent you wish to edit you will see the Edit Agent window. From here you can add or remove tasks for the agent to perform.
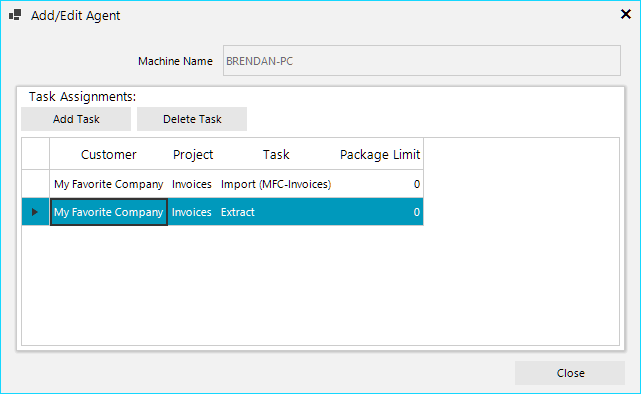
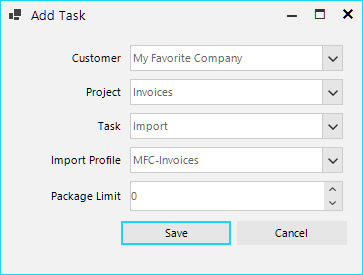
To add a task simply click on the Add Task button and choose the Customer, Project, and Task to perform. When selecting an Import or Export task you will also be asked to select a profile. On this screen you will also see a Package Limit option, this will allow you to have the Agent only perform the task so many times in a row before checking the next task, this is useful if you want to use the same agent for multiple tasks without the risk of the agent getting caught up on a backlog.
To remove a task from the Agents queue, simply click on the task you want to delete and then click on the Delete Task button. Alternatively you can use the right click menu as we covered above.

