Before You Begin
You will need the following
- A Customer created
- A Project Created
- PACE Data Capture Tasks
You will also need the following permission
- Login
Logging in
When you launch PACE Data Capture you will be greeted with the login screen. On this screen you will enter your Username, Password, and if you have more than one available, select a database to connect to.
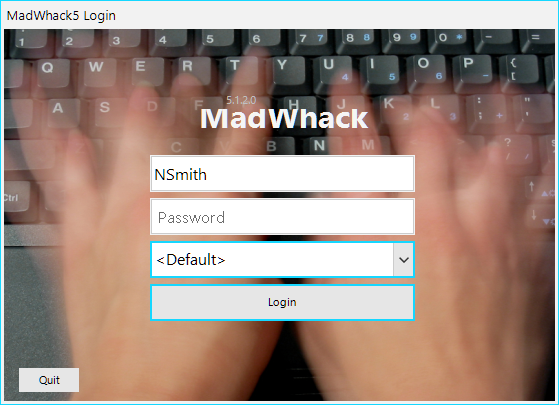
The Connections list will be based on your connection files stored within the installation location of PACE Data Capture. In most cases you will not need to change anything for this, but if you do have multiple connections, you can click on the drop down and select the one you want to connect to.
Keep in mind, every database will need to have separate logins set up. You can use the same username and password for all of them, but each will be set up individually.
Checking your Version Number
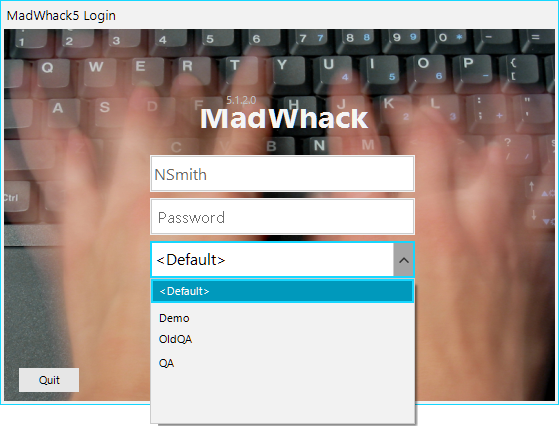
There may come a time you need to check your build version, this can be found either on the login screen, or by going to Help > About PACE while logged in.

Logging Out
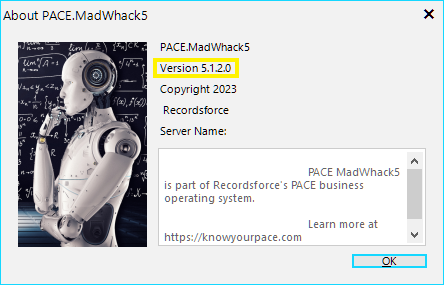
In the File Menu, select Exit.
Select Clockout if you want to Punch Out as well as Log Out.

If you need to Log Out of PACE Data Capture but stay Punched In, select Exit and stay clocked in.
Batch View
Upon logging into PACE Data Capture you will be met with the Batch View Screen. This is where you will be able to see the current Batches, Containers, and Packages within a given project.
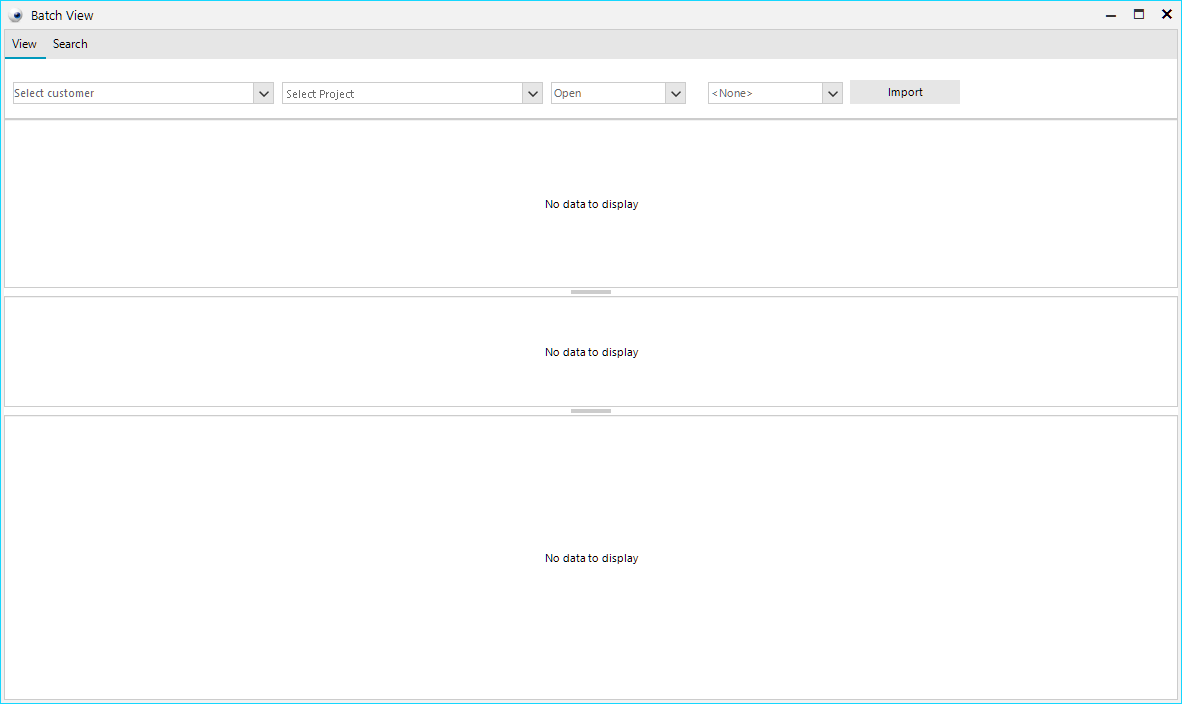
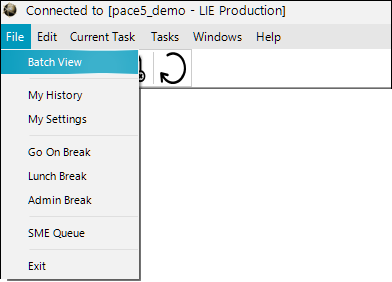
The Batch View window is open by default when launching PACE Data Capture, but if you close it, or would like to have multiple windows open, you can click on File > Batch View to open it up.
The Batch View window consists of two separate Tabs, View and Search. The View tab will let you select a specific Project and see all of the Batches associated with that project. The Search tab will allow you to type in a specific Batch, Container, or Package number to find that specific task.
View Tab
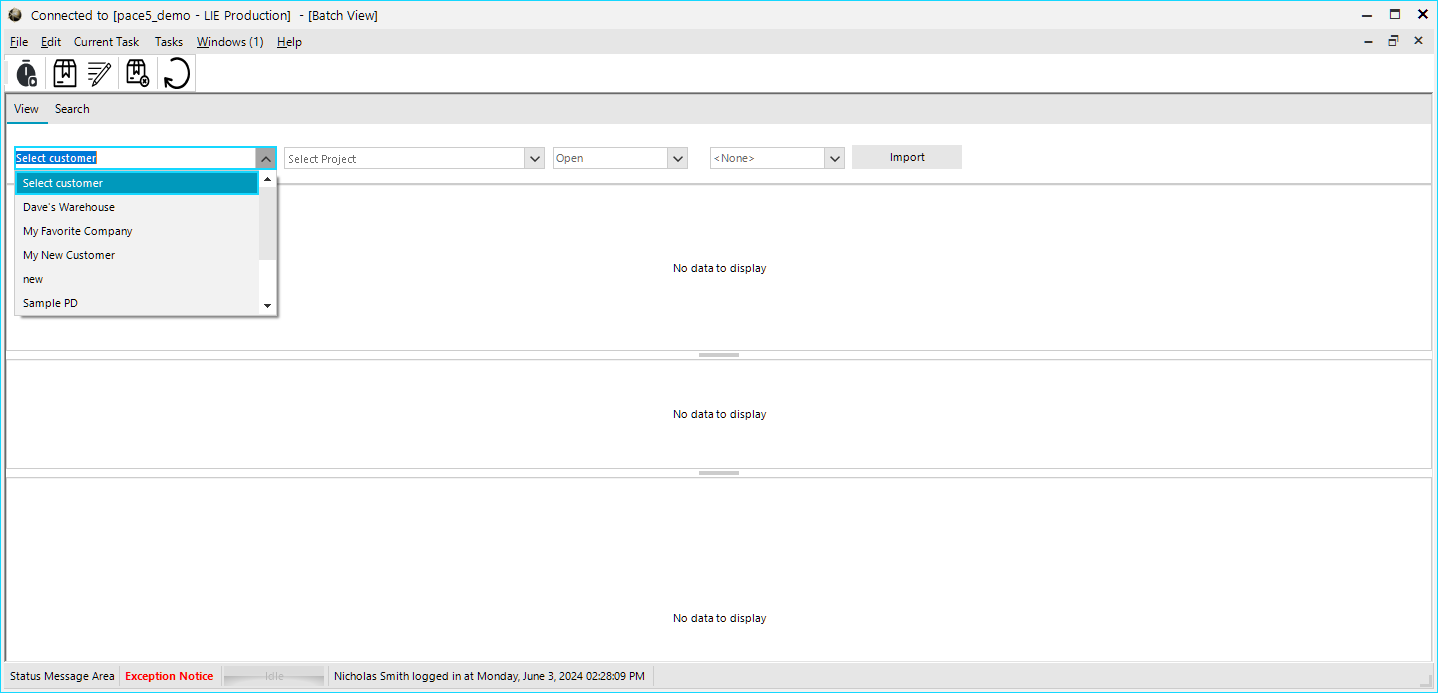
Within Batch View you will have a number of dropdown menus to select from. You will want to select the customer and project to view. You can also choose to view Open, Closed, or both open and closed batches on this screen. The fourth option is an auto-refresh timer, if you would like the screen to refresh on a set interval you can select an option from this fourth dropdown.
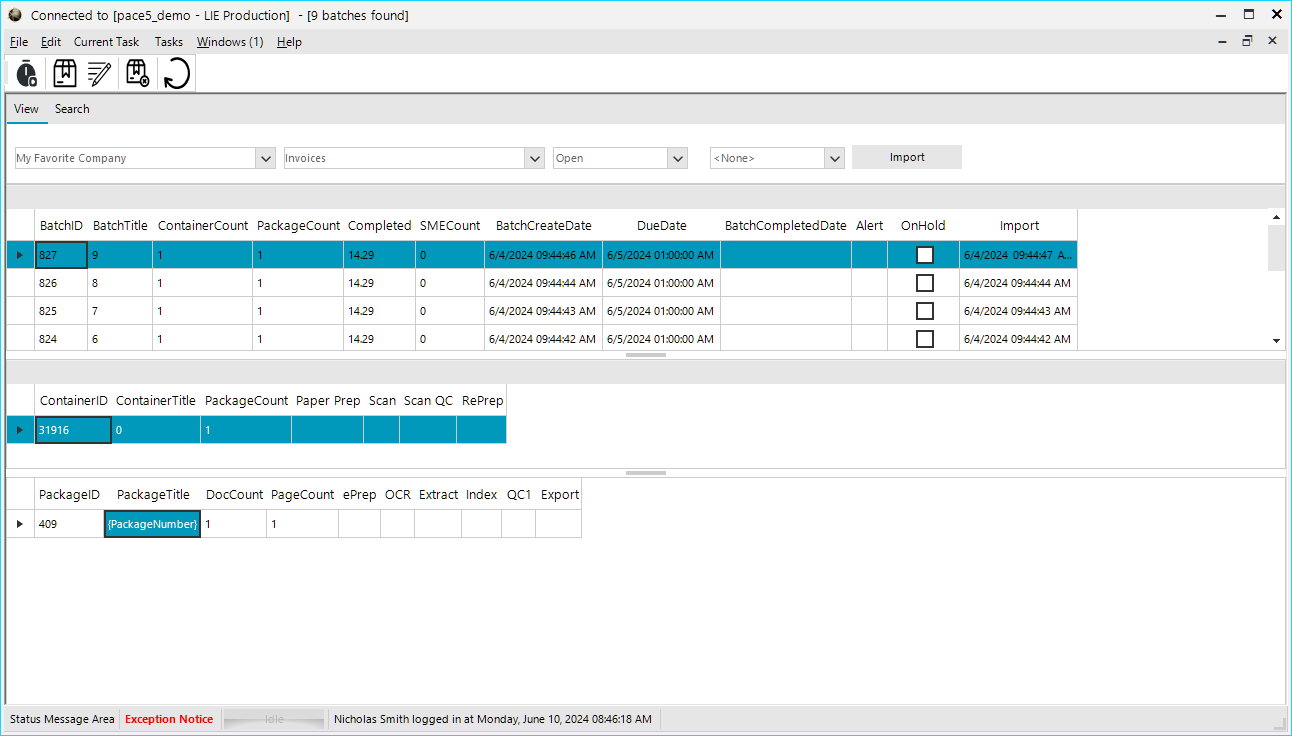
Once your Customer and Project are selected you will see the full list of batches. Selecting a batch in the top portion of the window will display the containers within that batch in the second section. Selecting a Container will then show the Packages in the third section.
Using Batch View
There are a number of things to see on the batch view screen once you have selected a project.
The columns in the batch section are as follows
Batch ID – This is the Batch number within PACE Data Capture and is set automatically based on the order things were created. This is spread across all projects and cannot be edited.
BatchTitle – The Batch Title is set based on Project Settings and can be edited by right clicking on the batch and selecting Edit.
ContainerCount – This shows the number of containers within a given batch.
PackageCount – This is the total number of packages within a batch, even if they are spread between multiple containers.
Completed –The completed % of a given batch. This is calculated automatically by the system based on the number of tasks within the project.
SMECount – How many packages within this batch are currently in SME. For more information on SME please see our SME User Guide
BatchCreateDate – This is the date the batch was first created in the system. This includes paper tasks, if a job has those.
DueDate – The date a project is due, based on the turnaround time in the project settings.
BatchCompletedDate – The date a batch was fully completed, this will be set automatically when finishing the last task in the batch.
Alert – This will display an alert message, which can be set on the Edit screen. This is useful if there is something unusual about a Batch that users should know before getting started.
OnHold – This shows if a package is currently on hold. This is useful if you are waiting on additional information about a project, and will prevent users in the queue from receiving that batch.
Batch Edit
Above we mention the Edit menu, in order to open that simply right click on the batch you wish to edit, and choose Edit from the menu that appears.
You can also choose Delete to completely remove a batch and all of its attached Containers and Packages from the system. This is not reversible so be sure this is what you want to do before committing.

Details Tab
The details tab is where you can edit most of the visible information for the batch screen. Any of the fields on this screen can be edited simply by typing into them or using the dropdown menus as the case may be.
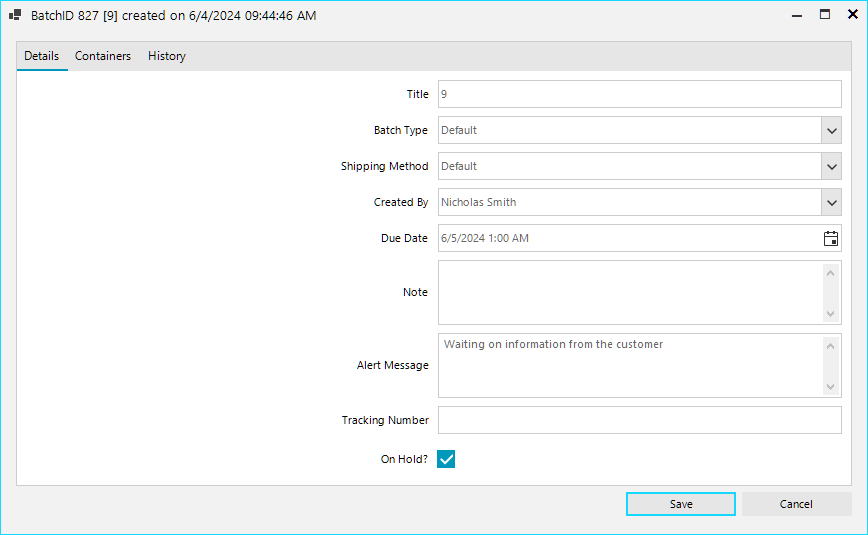
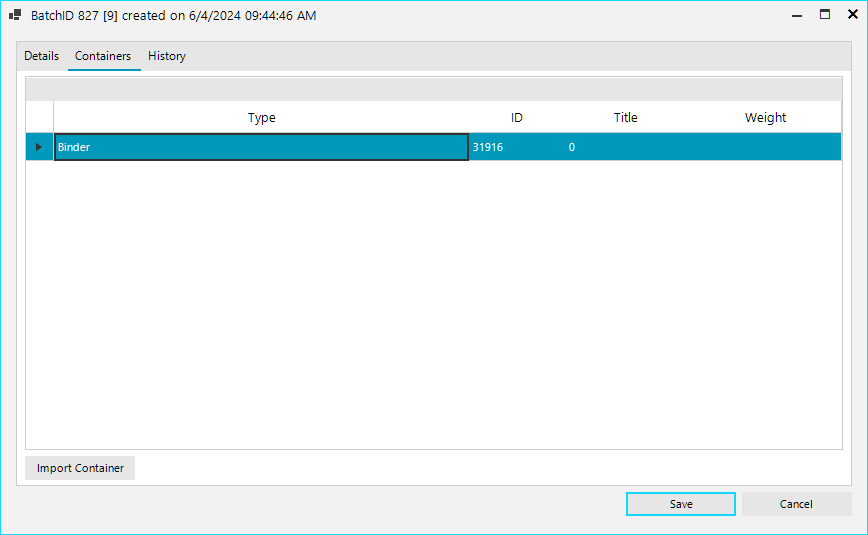
Containers Tab
Here you will see a full list of containers within the batch in question. Double clicking on a container will open the Container Edit window. We will cover this screen a little later in this article.
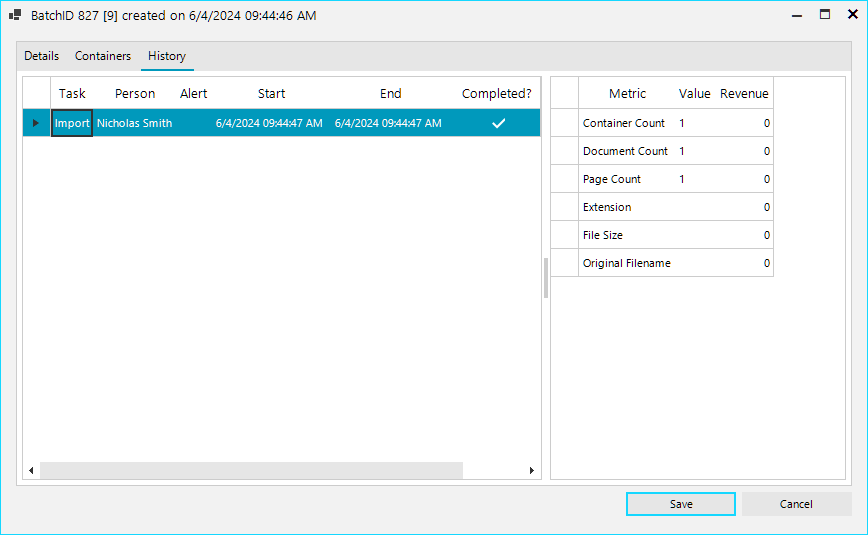
History Tab
The third and final tab in the Batch Edit screen is the History tab. This screen will display every time someone has interacted with a task in this Batch. Clicking on an individual entry will populate the right side of the screen with the captured metrics from that task.
Container Edit
Similarly to the Batch Edit screen above, the Container Edit screen consists of the same three tabs, all specifically relating to the container you have picked to edit. All tabs behave the same as above with the exception of the second tab now being one level further down into Packages.
Package View
With a batch and Container selected you will see a list of Packages within. From here you can start tasks, or edit the Package. You can also delete an individual package without deleting the container or batch it is associated with.
For more information about starting and working tasks, see our guides on ePrep and Indexing/QC.
If you would like to remove a package from this view without deleting it and without actually processing it, you can right click and choose “Auto Complete All Tasks.” This will mark the package as completed without needing to process it. You can also auto finish individual tasks, if you need to.
Additionally if you right click on a specific task you can unfinish that task, this will remove the finished flag and allow the package to re-enter the Auto Work Queue.
Package Edit
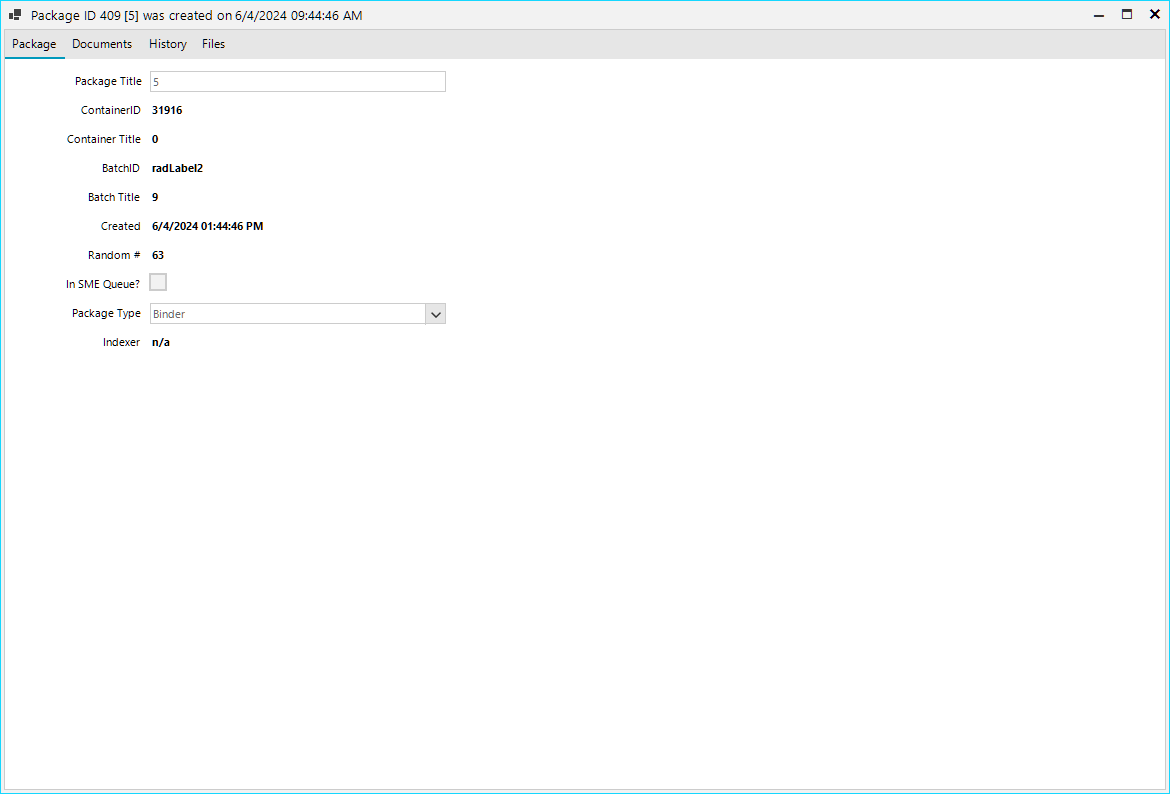
Right clicking on a package and selecting View Package will open the Package Edit screen. This screen has four tabs, Package, Documents, History, and Files.
Package
The Package tab will allow you to edit the Package Title and Package Type. The rest of the information displayed on this page is read only and cannot be edited.
Documents
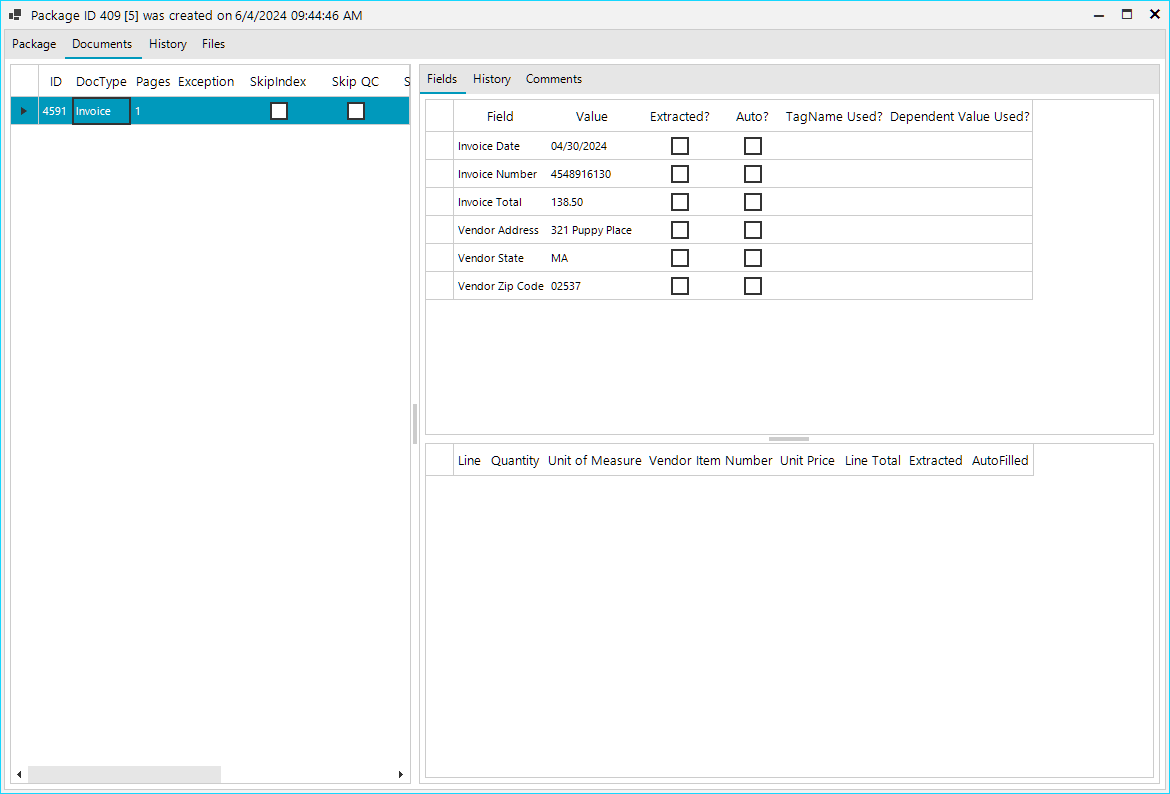
This tab will show all of the individual documents within a package. If the package has not been ePrepped and you have your import set up to only create one package, that is all you will see here. Once a package has been prepped or if your import is set up to create multiple documents then those will all appear on this list.
Clicking on a document will populate the right side of the screen with information about that Document.
The Fields tab will show all of the fields associated with that docType, and if they have been processed will also show the information that has been captured.
History works much the same way it does in the above examples, and will show every person who has entered that document in a task.
Comments will show any comments that have been left on this package.
History
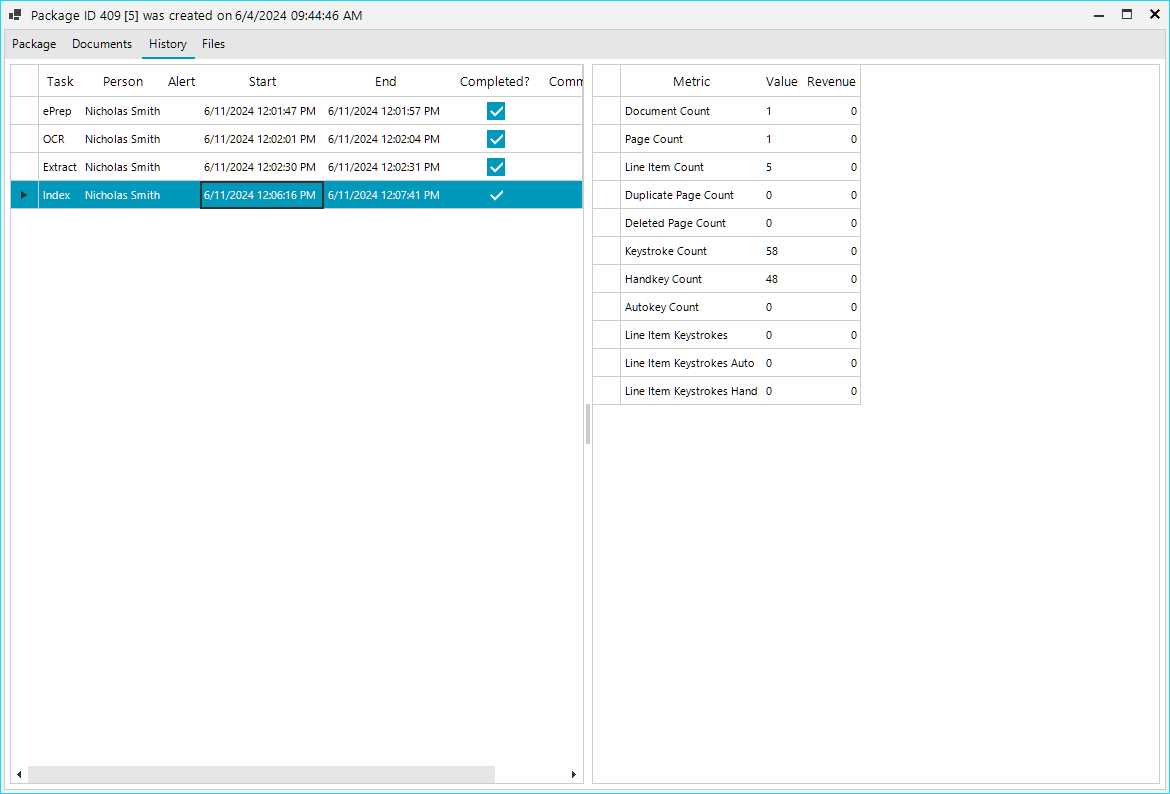
This tab, much like in all other cases, will show the users who have interacted with this package and the time data associated with that interaction. Clicking an entry on the list will allow you to see the metrics for that interaction.
Files
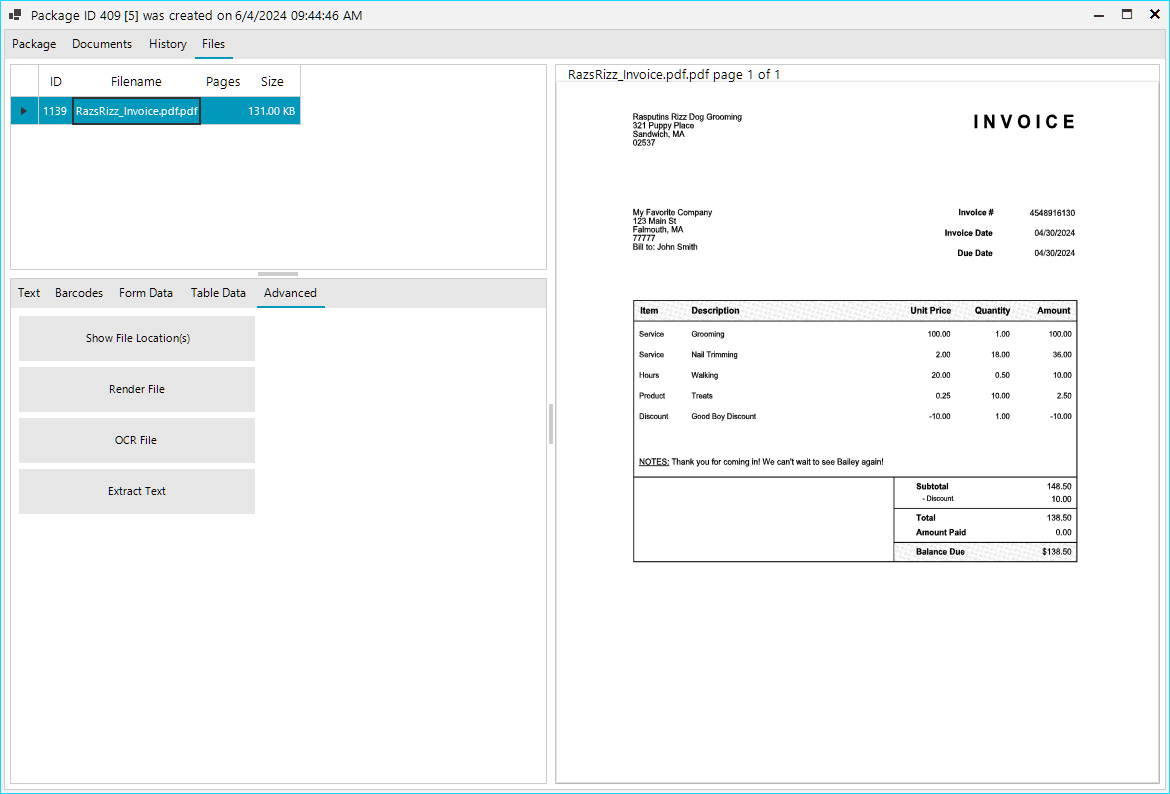
This tab will show you the original files that had been imported to create the package. Selecting one of the files on this screen will allow you to use the tabs below to see information about that file.
Text will display any text that has been found through OCR or extraction, if either of those have been run on this package.
Barcodes will display information if a barcode is found within the package, and the setting to use barcodes has been enabled in Project Setup.
Form Data this will show a table of all of the data pulled from the document during OCR/Extraction, arranged in a list.
Table Data Similar to Form Data this will show the tables that were found on the page. This is different from the Form Data in that it only captured
Advanced has several options for things you can do with that file.
- Show File Location(s) will show you the file paths for the repository the file is being held in. This does not show the location of the original files, instead it is showing the location of the copies of the file PACE Data Capture is using.
- Render File This will allow you to re-render the images in a file. This is useful if something went wrong with a render or if you need something rendered in a different way.
- OCR File Clicking this button will allow you to run OCR on the selected file. A new window will open with a drop down for the available OCR methods. Simply select the one you want from the list and click OCR
- Extract Text Similar to the OCR button above, this will allow you to run extraction on the selected file. This can be useful if something was missed in ePrep and you need to extract additional information without running every other file through again.
Search Tab
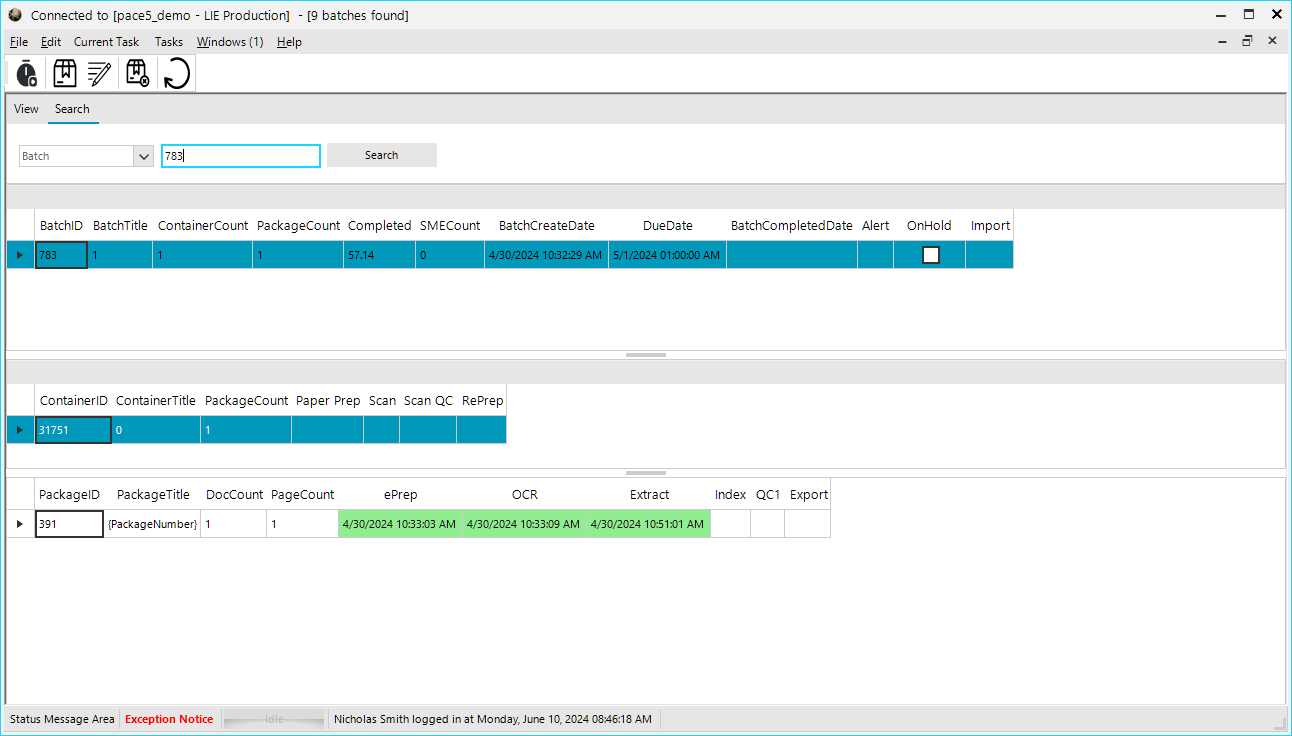
The Search tab will allow you to enter a Batch, Container, or Package number and find that within the system, without selecting a customer or job. This is useful if you have something you need to look into in a specific package.
To use the search, simply select what type of object you are looking for then type in the corresponding number and click search.
My History
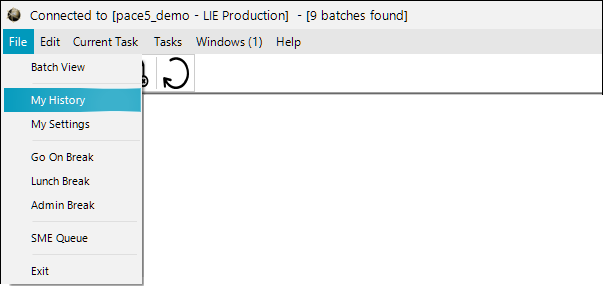
To view your history you can click the File menu and then choose My History.
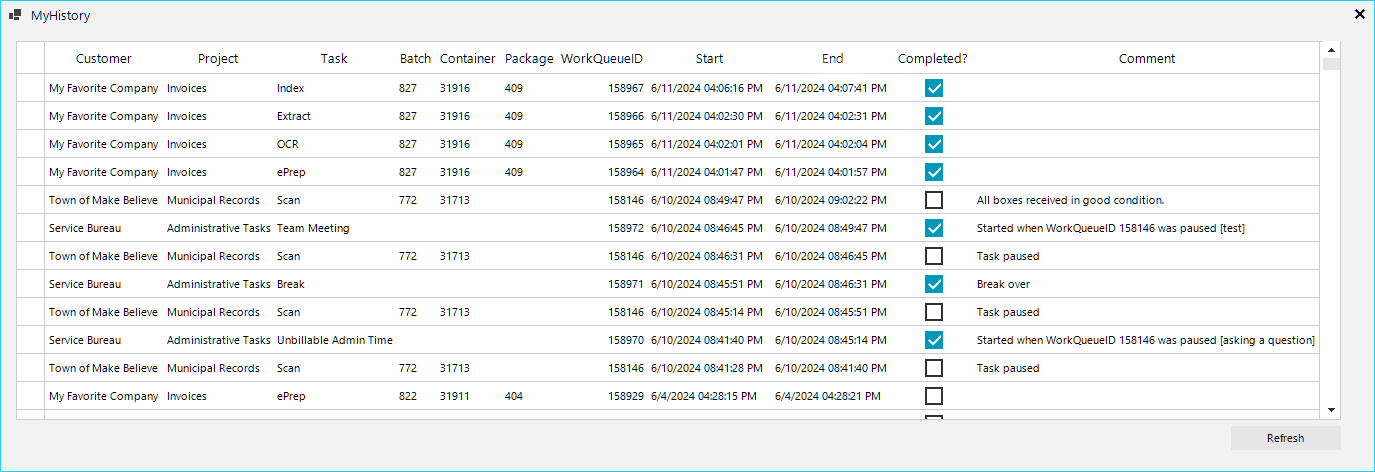
This screen will show a list of all of the tasks you have worked on as well as any comments you might have left and your start and end times.
My Settings
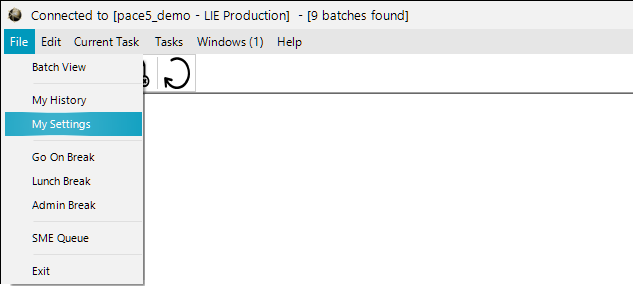
To get to your settings page click on File then My Settings.
From here you have a few different options for things you can do.
Maximize PACE Data Capture Window on Startup – If you check this box, the PACE Data Capture window will resize to fit the full screen whenever you launch it. Otherwise it will open in a smaller window.
Open log viewer on startup – This will open the log viewer window when launching PACE Data Capture. A log is always saved when using PACE Data Capture, but this will allow you to see what is being output in real time.
Log these events – Here you can choose one or more types of event to be included in your logs. These include
- Debug
- Information
- Warning
- Error
- Fatal
You can also change your theme, which will change the colors and feel of your PACE Data Capture windows.
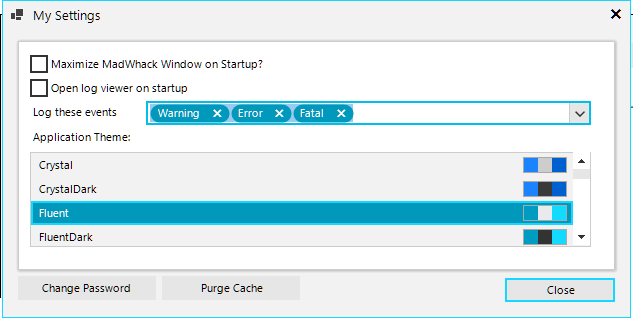
From this screen you can also change your password if you would like to, simply click on the Change Password button and follow the instructions that are displayed.
Lastly, you have the option to Purge your image cache. There may be some instances where images fail to load because you’ve run out of cache space. If this happens simply use the Purge Cache button to remove all of the oldest images in your cache.

